Sunday, 19 October 2014

Combining contemporary society with the Elizabethan era


This advert shows the extent to which you can combine the old and the new, and how it works extremely well. This is beyond something I would love to achieve by the end of my project, but it provides a lot of inspiration and a limitless amount of ideas.

And just a quick behind the scenes clip for more info...


And it's not just Beyonce who has been involved with combining modern day society and the past - the Geordie Shore crew (reality TV show) have also done the same, and it's safe to say, you can't get much more 'contemporary' than the Geordie's! Although this look is not necessarily Elizabethan, it has a key theme of royalty and just shows how the 2 different eras can work together. 

Thursday, 16 October 2014

Waves and Frizzing

The smaller and tighter the section of hair you do, the smaller and more defined wave you will create.
  • Take a section of the hair and put the hair in between the pin, sliding the pin down to the root
  • Wind the hair around the pin in a figure of 8 motion 
  • Continue doing this until you come to the end of the hair - at the end you can simply wrap the hair around the end of the pin
  • Then slide a grip down the middle (downwards towards the roots) to hold it in place 
  • Hold the straighteners over this for 5-10 secs
  • Leave it to cool and set before taking it out
  • You can then lightly brush this out to make it much more frizzy and give it more volume
  • Then style as you desire


    I found creating this style quite straight-forward. I actually really like the waves when they are tight and defined, but I think the frizzing technique/style will work well when creating an Elizabethan look.

Wednesday, 15 October 2014

Initial research

The key to this hairstyle looking Elizabethan is the use of pearls being threaded through the plait, and this is what I like about this style - it is fairly simple but quite effective

The use of plaits to create buns is very effective in this instance, as the plaits appear clearly defined, and thus make the style look more complex and comprehensive 

This portrait shows Queen Elizabeth I with red hair and curls flowing onto the shoulders

This image to me seems like a common style that Elizabethan's would wear, because it would be practical but also looks effective. 

I like how in this picture different plaits have been used to create texture and different layers within the hair. It all looks very neat and precisely finished. 

Realistically, I think this look would be unachievable for me to create, but it allows you to see the extent of things that you can do with hair, and that there literally are no boundaries. This style looks extremely complicated but it works very well and incorporates many different plaits and braids, as well as using accessories within it. 

The project brief - Redheads & Royalty


The brief focuses on collating historical research and technical observations of the hairstyles used in the Elizabethan era. You should consider the various hairstyles and hair colours used by Elizabethan women with reference to their age, class and status.

You are required to practice a variety of historically accurate Elizabethan hairstyles in class, you are also going to create a more contemporary version using clear references to a style of Elizabethan hair you are inspired by. Develop the project by referencing contemporary versions of Elizabethan hairstyles. 

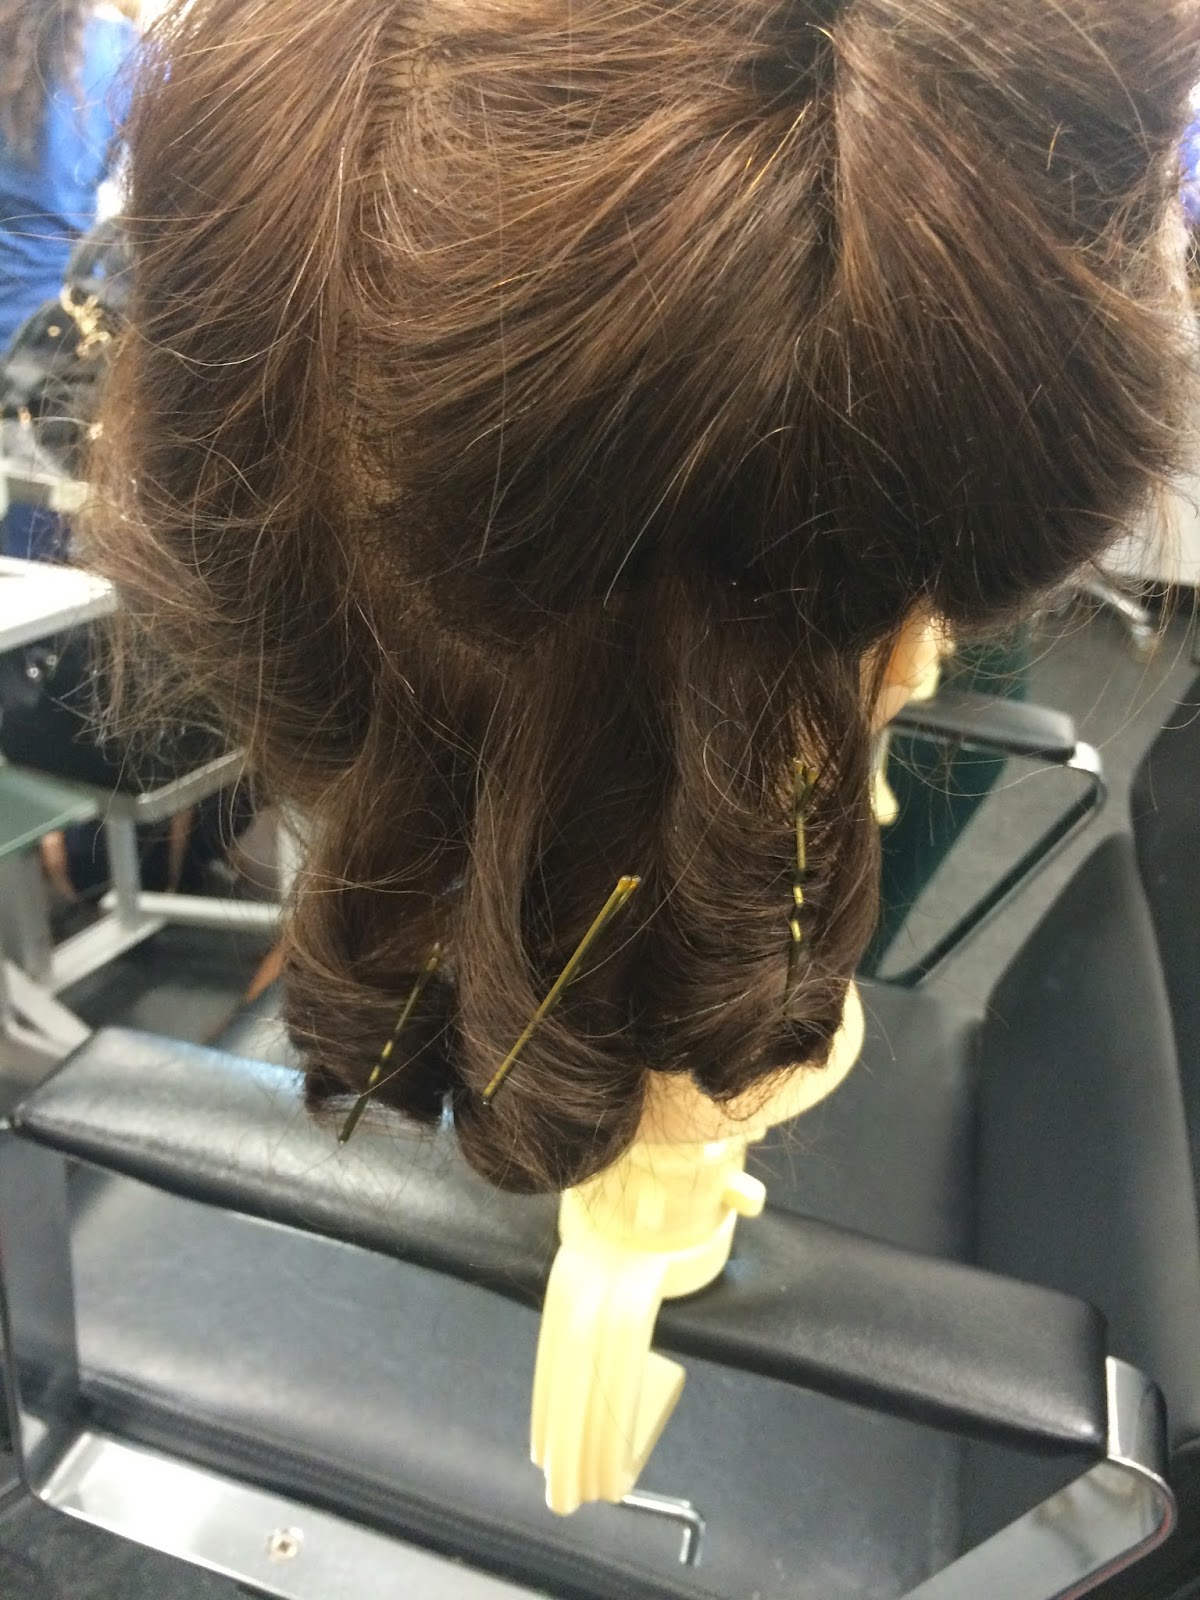
Being perfectly honest, I do not know an awful lot about Elizabethan hair or the techniques they used, but I am definitely excited to learn! The only thing I know and am confident about is the fact that they use very tight curls and tend to have their hairline quite far back.

But on that note, I am looking forward to learning how to create the type of styles they used and seeing how they differ, or are still used in today's contemporary society and modern fashion. 

Curling & Crimping

Curling the hair
(We will be using a barrel tong to create spiral curls)

  • Heat the tong up to around 25 degrees
  • Start from the bottom 
  • Section the hair so that the majority is clipped on top of the head, but there is one section left down which you will curl
  • Take a square section of hair and clip the end into the tong
  • Wrap the hair onto the tong, ensuring the curlers are kept upright
  • Use the comb to separate the tong and scalp if necessary
  • Leave this on for about 12 secs
  • Remove the tong by wiggling the wand out underneath the curl
  • Clip this into place with a grip, to ensure it cools in this position


  • Take another square section of hair and curl this piece in the opposite direction
  • Alternate the direction of curls throughout the whole process
  • Carry on curling the hair in sections, working your way up
  • When you get to the top of the head, ensure the tong is vertical (facing down)


Crimping the hair 
  • Heat the crimpers up to about 190 degrees
  • Section the hair off, starting from the bottom
  • Ensure the section you take is not wider than the width of the crimper
  • Firmly press and hold the crimper for 5-10secs
  • Move down slightly, so that the waves join up - ensure you allow some slack so you do not pull the previous waves out


  • Repeat this process all the way down the section and then all over the hair


You can then experiment with brushing the hair out/styling it and moving it around….


Wednesday, 8 October 2014

How to create 3 different plaits

Creating a standard plait
  • Separate the hair into 3 equal strands. Hold 2 strands in your right hand with your palm facing up. Hold the third strand in your left hand.
  • Turn your right hand over so your palm is now facing down. This makes the right strand now in the middle and the middle strand on the right.
  • Switch hands and hold right strand in the right hand and the middle strand and left strands in the left hand with palm facing up. Turn your left hand until your palm is facing down.
  • Repeat steps 1 - 3 until there is no hair available to braid. Fasten with a hair band.
A basic plait

Creating a french plait
  • Take 3 sections of hair and plait as normal to give tension
  • Take a section of hair from the opposite side to which the middle piece is facing
  • Pull this onto the middle piece (leaving you with 3 strands still)
  • Continue the plait until you get a new middle piece 
  • Take a piece of hair from the other side and pull over the middle piece
Continue doing this until there is no more hair left to plait
A french plait


Creating a fishtail plait
  • Part the hair into 2 equal sections 
  • Take a small strand of hair from one side and cross it over to the other side
  • Repeat with the opposite side
  • Continue this until there is no hair left to plait
  • Do not do this too tight, and do not take strands which are too large 
  • If you are finding it difficult or it is your first time, I recommend putting the hair into a ponytail first and plaiting the ponytail

My 1st attempt

My 2nd attempt

My 3rd attempt
Fishtail plaits were the only plait out of the 3 that I had never attempted before, but by the 3rd attempt I think I was beginning to get it right and it worked quite effectively. I began learning the correct size of the strands that I should be adding, how tightly I should be pulling and how much tension there should be, and just in general how to hold and create the plait.
The key thing to remember is practice makes perfect!

How to create a bun (without a doughnut!)

You can have this bun on the side of the head or lower down at the nape of the neck, but I am demonstrating it quite high up on the head. Also, the look I am creating is a half up, half down style due to the complexity that is added when you focus on getting on the hair from underneath into the bun as well. 
  • Brush the hair through until there are no knots of tangles (removing any partings
  • Use a pin tail comb to separate the hair from just above the ears
  • Comb up and create a pony tail high up onto the head (if heavy hair, then double band)
  • Brush this ponytail through
  • Take the front section of the pony tail (bearing in mind it will be separated into 4)
  • Lift this piece up and backcomb close to band up to the mid length of the hair
  • Then comb and smooth through the side that will be on show
  • Roll this piece of hair using 2 fingers creating a barrel curl shape (make sure it is square and facing forward, and that there are no twists)
  • Place a curvy grip into each side of this roll (2 if thick hair)
  • Repeat this process with the other 3 
  • Then use hair pins to manipulate the hair to close the gaps
  • This should make the bun much more rounded rather than square

  • When you are happy with the shape, put the hair pin into the base of your bun against the scalp (make sure the pin is not too wide)
  • If there is a problem, simply remove and fix the section, instead of taking down to whole style


The end result


I enjoyed creating this style, because it is something that does not take an immense amount of time, but yet still look very effective. It saves the awkwardness and problems of having to use a doughnut but still gives the same sleek result.

The shape and size of my bun was good, and I think I did fairly well for a first attempt. However, the only problem I did encounter was that where you remove the gaps, some of the hair had actually twisted slightly and was almost edging out of its ‘area’ - the hair was originally in the side roll but had moved too far over into the front roll.

Hair is twisted slightly